This website contains affiliate links. We earn a commission when you buy a product or service using these links.
Publish date: February 25, 2023
Step #5
To do list for this page:
Learn how to use WordPress to manage your site and create pages and blog posts.
Login to WordPress
Login to the WordPress dashboard on your new website by typing www.mywebsite.com/wp-admin/ into the address bar on your browser (substituting in your domain name for “mywebsite.com”) and use the username and password that you created.
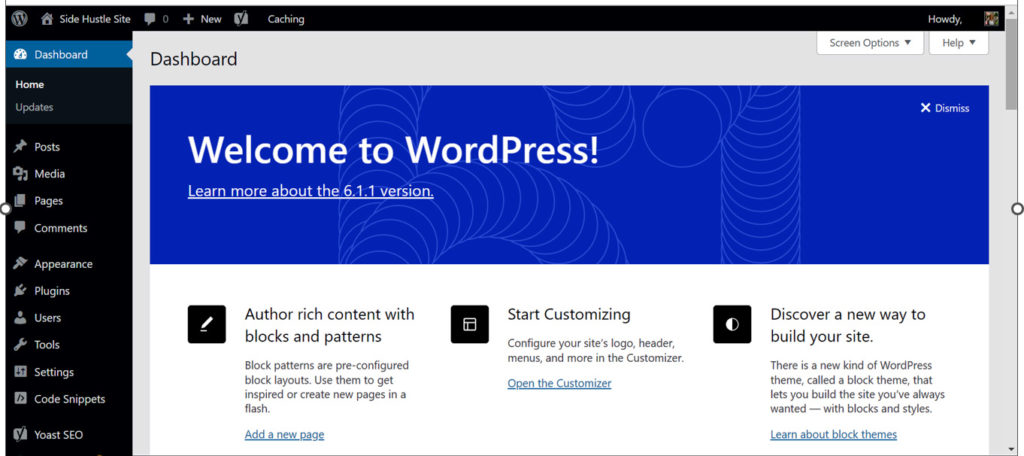
Get started with WordPress! Use the one click install to start that Blog you’ve always wanted!
Dashboard tour
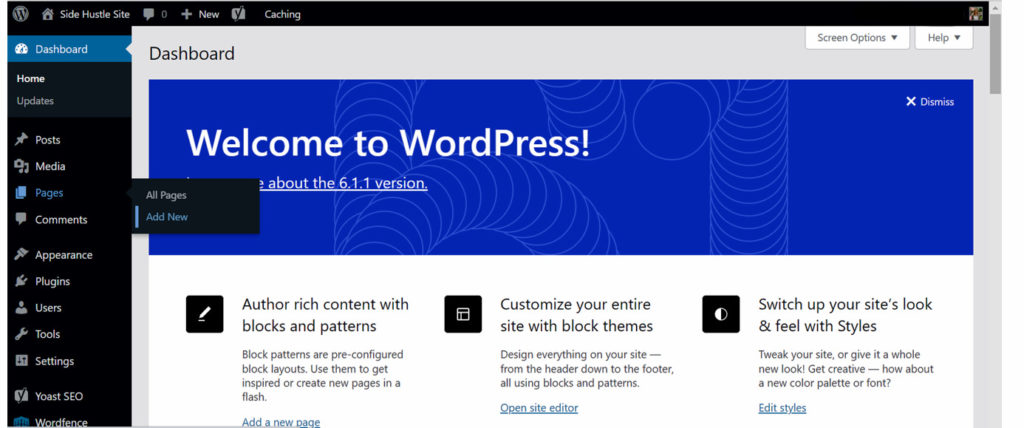
The WordPress menu is on the left side of your screen (black sidebar). Many of the menu items open into submenus when you click on them.
Posts – Create or edit blog posts, establish categories to organize your posts or add hashtags in the Posts section of WordPress. If there are currently sample categories or hashtags that were added when you installed WordPress, you can delete them. You will want to create your own. You can also create categories or hashtags when you write posts or create pages.
Media – When you add media (images, videos, etc.), they will be listed in your media library. You can also add media from within the post or page creation pages.
Pages – Create the static (non-blog) pages in the Pages section of WordPress.
Comments – View comments that website visitors post on your page.
Appearance – Change the theme (design template), customize aspects of the theme, add widgets (features) to your site and customize the structure of your website menu.
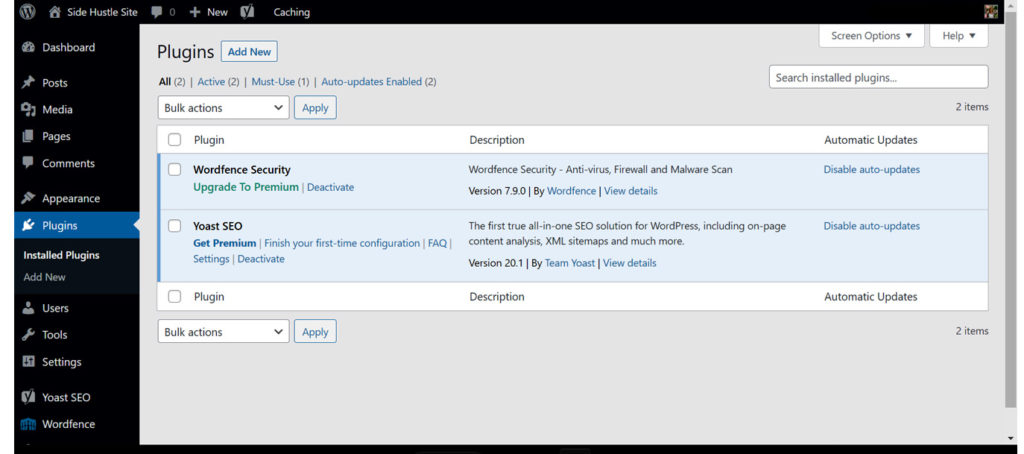
Plugins – Add new features to your site.
Users – Establish users and assign roles if other people will be logging in to work with your site.
Tools – You can import or export data from other content management systems.
Settings – Set up or customize your website. It’s a good idea to click on each of the subcategories and see if you want to make any changes to the default settings when you are setting up your site. In the Reading section, do you want your home page to be a static page or your blog post page? In the Discussion section, do you want people to be able to write comments on blog posts or not? Do you want any restrictions on comments?
Customizing the appearance of your site in WordPress
Themes
The first step to customizing your website is to select a theme (design template). You probably already did this in the setup process. If you later want to change your theme, you can do this in the menu under Appearance and then Theme.
Editor
If you selected the WordPress 2023 theme, you will see Editor listed in the Appearance menu. WordPress 2023 is a fully customizable theme and Editor is where you can make changes to the appearance of your website. This site uses the WordPress 2023 theme. We will get into detail on how to use the WordPress 2023 theme in one of the articles in the Tips & Tricks section of this site.
Customize
Once you’ve selected your theme, you can customize it by selecting Appearance in the menu and then Customize. The customizations will be different depending on the theme you selected. Generally you can change the color scheme, add your logo and change the position of the menu. You’ll want to explore the options and try them out to figure out what you like.
Widgets
In some themes Widgets will be listed under the Appearance menu. This is where you can select what information you want in sections of your website. For example, do you want it to list recent posts in the footer of your website? This positioning is alternatively done in the Editor section on the WordPress 2023 theme.
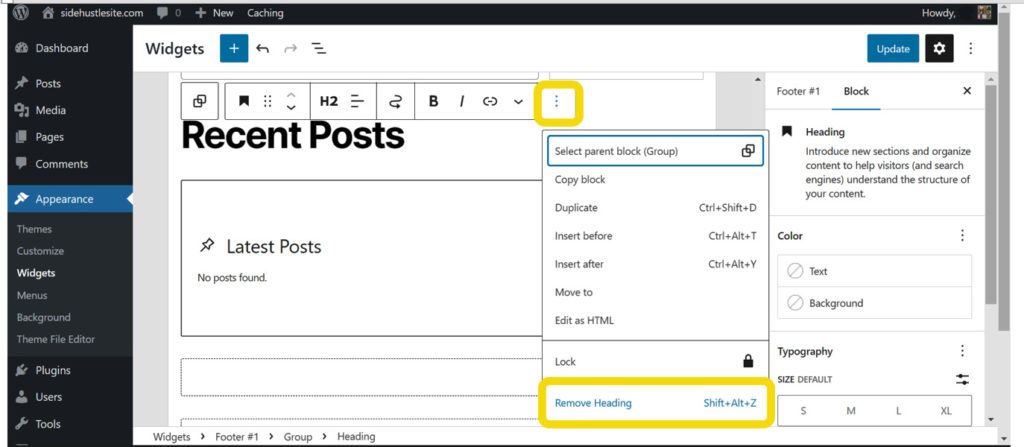
How to delete a widget
If you want to remove one of the default widgets, click on the widget or the heading, then click on the button with three vertical dots on the right. The last option on the menu that pops up is to remove that item.
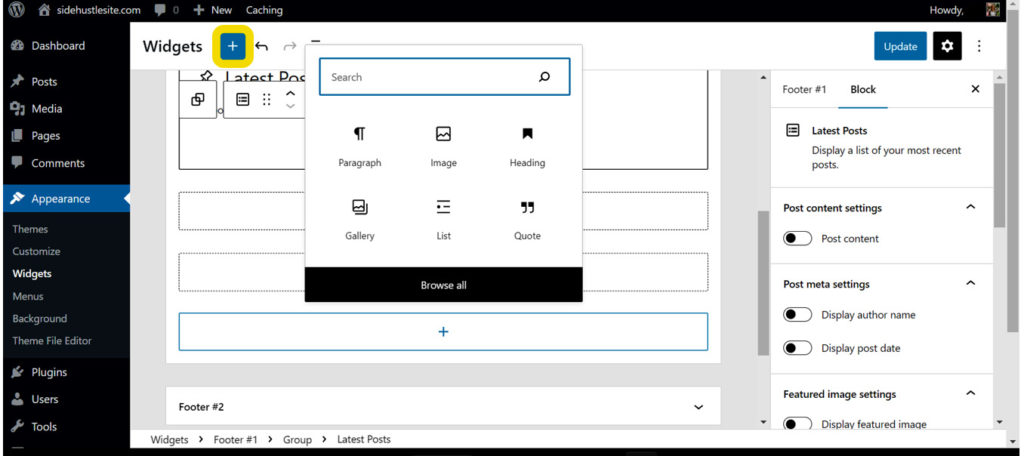
How to add a widget
If you want to add a widget block, click on the button with the plus + symbol and select what you want to add.
Menus
In some themes Menus will be listed in the Appearance menu. From here you can change what items are included in your website menu and its location. By default it will add any new “top-level” pages that you create to the menu. From within the Menus tab, you can take off this default setting if you choose, or add or remove pages from the menu.
Background
In some themes Background is an option in the Appearance menu. You can select an image to appear in the background of your website.
Plugins
WordPress plugins are pieces of software that add new features to your site. Plugins can add bells and whistles to your site, but they can also cause your site to load more slowly. Add plugins if they add important features, but delete unnecessary ones.
How to create a static page in WordPress
Static pages are the non-blog pages of your site. To add a new page, select Pages and then Add New.
First give your page a title. Click on the Add title section, and type in the title of your page.

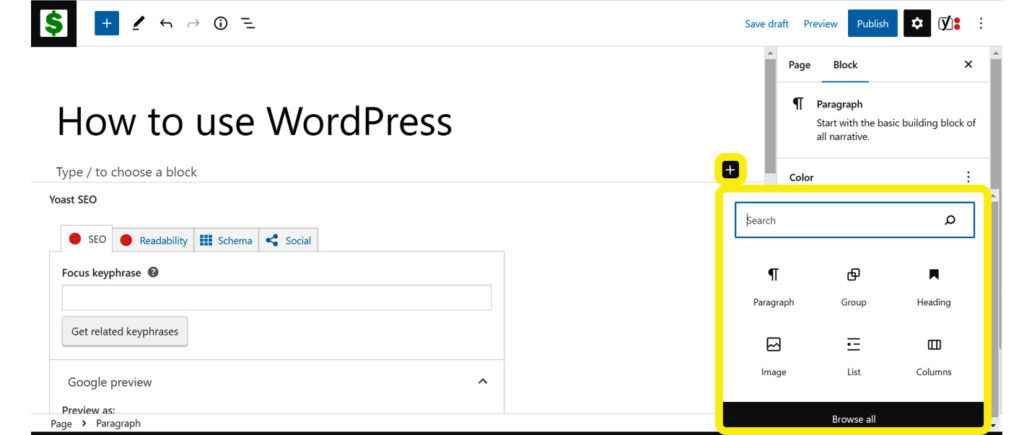
The pages in WordPress are made up of “blocks.” A block can be a paragraph, list, image, heading or many, many other things. If you want a paragraph, you can just start typing in the space below the title (the first block). If you want to change the block type from a paragraph to something else, you can hit the / key on your keyboard while you are in the block to see common block types, or click on the black square with the plus + sign on the right. When you click the black square with the plus + sign, it opens a list of common block types. You can also click on Browse all to see more options.
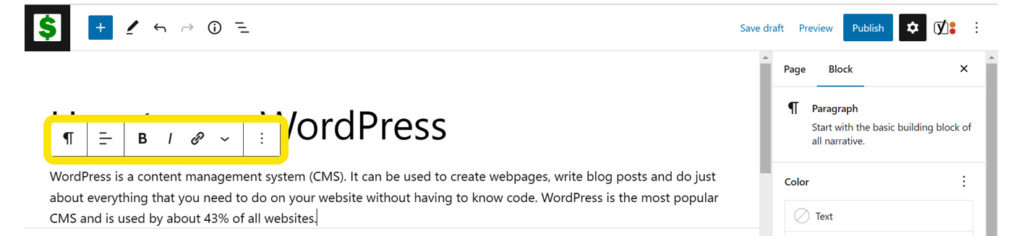
When you are in a block, you will see a popup toolbar of formatting buttons for that block type. For example, in a paragraph block, you click on the ¶ button (the first button) to change the block type. The second button is to change the paragraph alignment. The third button is bold. The fourth button is italic. The fifth button is to add a hyperlink. The down arrow is to open a list of more formatting options. The three dots button is to see a menu of block options (such as inserting a new block before or after the current block or removing the block). If you hit the Enter key on your keyboard at the end of the paragraph, another block will be created below the current one.
When you’re finished with your page, you just click on the Publish button.
How to create a post in WordPress
The process for creating a post is very similar to creating a page because a post is basically a page (an article). From the dashboard, select Posts and then Add New. Give your post a title in the same way that you give a page a title. Start typing your first paragraph in the first block just as you do on a page. You can change the block types just as you can on a static page.
What’s the next step?
Now that you know how to use WordPress, you can start brainstorming and writing some articles for your website. In the next lesson, learn How to pick topics for articles.