This website contains affiliate links. We earn a commission when you buy a product or service using these links.
Publish date: February 23, 2023
Step #4
To do list for this page:
Install WordPress on your site and begin to set it up.
What is WordPress?
WordPress is a content management system (CMS). It can be used to create webpages, write blog posts and do just about everything that you need to do on your website without having to know code. WordPress is the most popular CMS and is used by about 43% of all websites.
Advantages to using WordPress
- It’s free!
- You can create a website from scratch quickly and easily without knowing code.
- It’s easy to give your site a professional look with design themes.
- You can add new features to your site using plugins.
- Your website can have both static pages and a built-in blog.
Get started with WordPress! Use the one click install to start that Blog you’ve always wanted!
What are themes and plugins?
- Themes are design templates to easily change the look of your site.
- Plugins are pieces of software that add new features to your site.
How to install WordPress on HostGator
- Log in to hostgator.com to get to the general dashboard.
- Click on the Install WordPress link on the right.

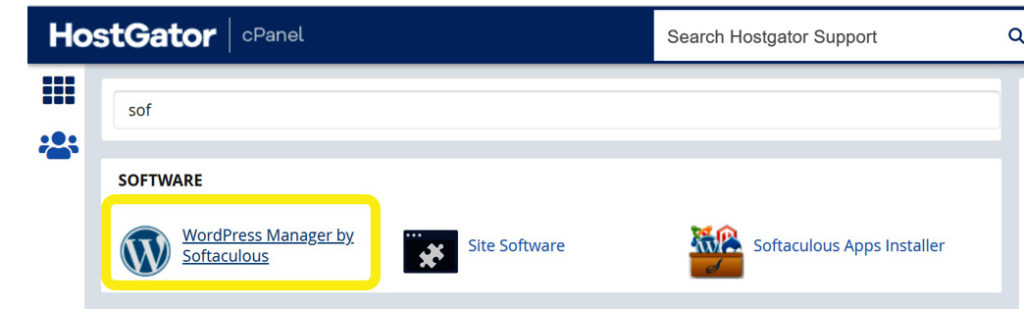
Another alterative way to get to the place where you can install WordPress is to go to the HostGator control panel (login sent to you when you signed up for HostGator) and select “WordPress Manager by Softaculous” in the Software section of the control panel.
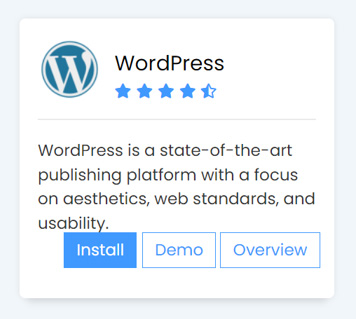
3. Click on the blue Install button to install WordPress.
4. Click the down arrow and then select the website that you want to install WordPress on.
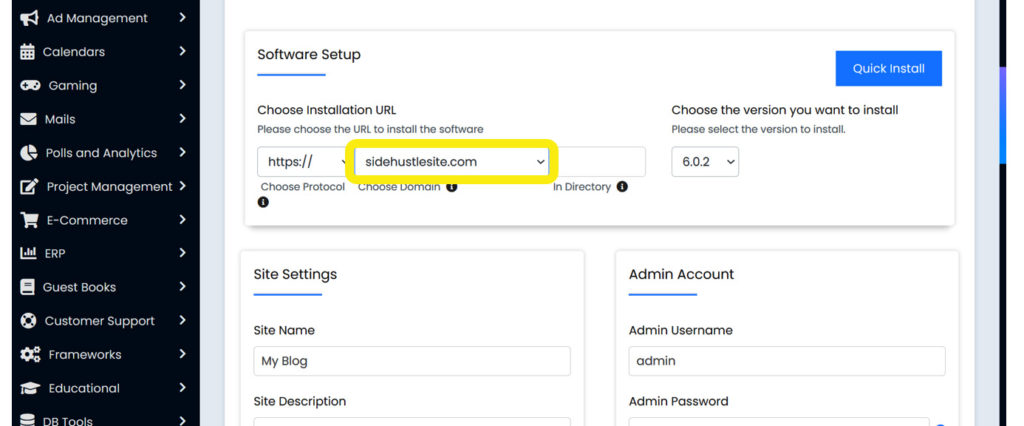
5. In the “Admin Account” section on the right, change the name of the admin username to something other than admin to make it more difficult to hack. Also, create your own password and fill in the Site Settings (site name and description).
6. On this same “Software Setup” page, you can select a theme. Themes are templates for the website’s design. Select a theme that you like, but you can always change it or customize it later. This website uses the WordPress 2023 theme. It is a free theme and very customizable.
7. Finally click on the blue “Install” button on the bottom of the page to begin the WordPress installation.
That’s it! WordPress has been installed, and you’re ready to start customizing it.
Your first login
Login to your new WordPress installation on your website. For example, type www.mynewwebsite.com/wp-admin/ (substituting in your domain name) in the address bar and use the username and password that you created.
Cleanup
Next you’ll want to cleanup some of the extra items that were installed with WordPress. They tend to create placeholder pages and posts so that you can see what the website can look like. They also install some plugins by default.

Placeholder pages
Click on “Pages” on the left side of the screen. When I installed WordPress, it created the following placeholder pages.
About – You will probably want an About page on your site, but it may be easier to delete this placeholder and create your own from scratch later rather than deleting all of the content on their placeholder page.
Blog – You could leave this unless you aren’t going to want a blog on your site. This is where posts will be published in chronological order. Another option is to make the blog page your home page. If you choose to delete this page, you can always designate another page as your “Posts page” (meaning the page where blog posts are published).
Contact – Again, you may want a contact page on your site, but it may be easier to delete this placeholder and create your own from scratch rather than deleting all of the content on their placeholder page. Another alternative is to just include contact info in the footer of all pages and/or include it on the About page.
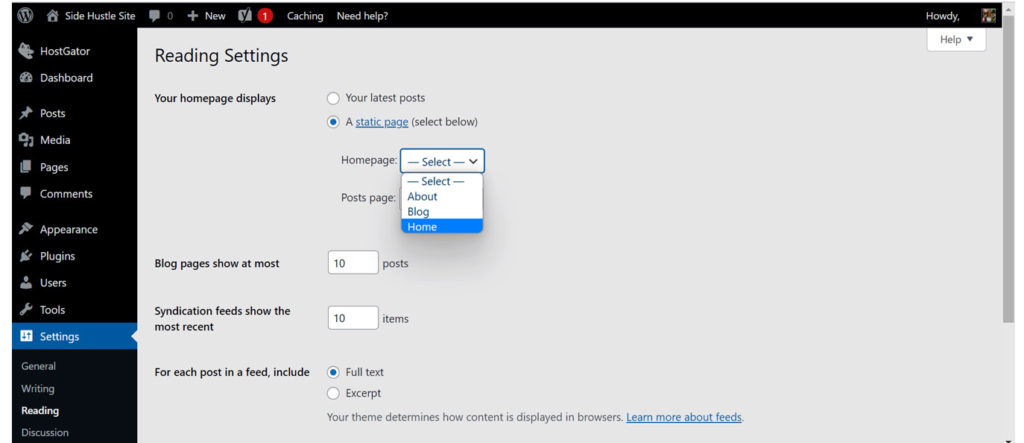
Home – Of course, you will need a home page for your site. I would delete this placeholder page, however, and start with a new home page. Any page that you create can be set as your home page (front page). This will be the page that website visitors see when they type in your basic domain name (website.com). After you create a page that you want to be your home page, click on Settings on the menu on the left side of the screen, then Reading. Where it says “Your homepage displays,” select “a static page” and then select the page that you would like to be your home page. Finally, scroll down and click on the blue “Save Changes” button.
Privacy Policy – You will need a privacy policy for your site. They provide some sample text for a privacy policy that you could edit, and use, or you could search for privacy policy generators on the web. I use https://legalformsgenerator.com/ for my privacy policies and other legal documents. What I like about their service is that they host my legal documents, and their lawyers update them automatically as the laws change. You set up your legal documents online at legalformgenerator.com. They provide links that you include on your site (I put them in the footer), and they automatically update them for you as needed. One subscriptions covers all of your websites. You don’t have to pay per site.
Processes – This is just a sample page so you can delete it.
Sample Page – Delete this.
Sample posts
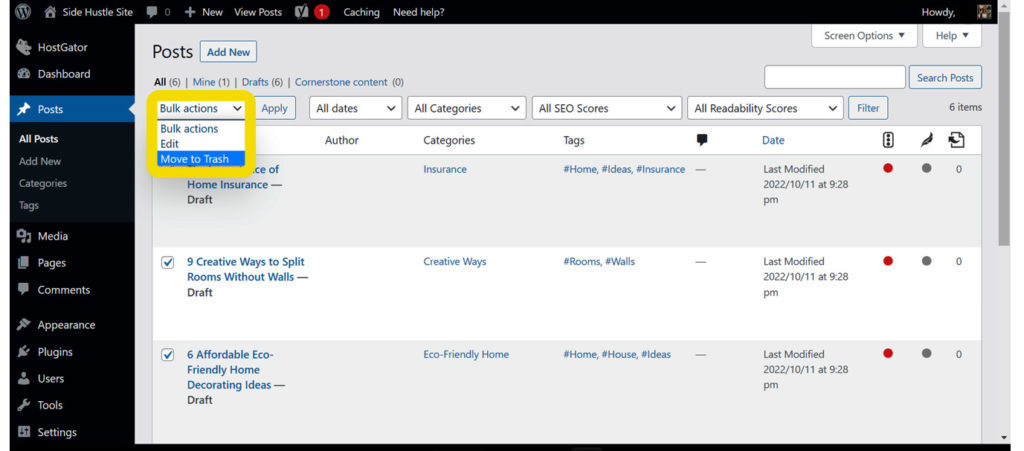
Another thing that you will want to delete is their sample posts. Click on “Posts” on the menu on the left side of the screen. Click to select all of the sample posts, click on “Bulk action,” then “Move to Trash.”
Plugins
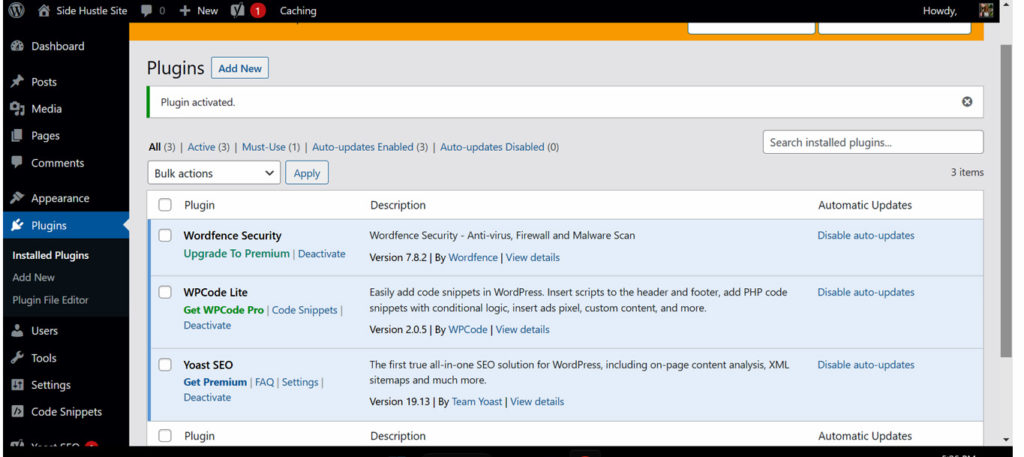
Several plugins are automatically installed when you install WordPress. You may or may not like the plugins that they install. Keep in mind, however, that having many plugins can slow down your website so it’s better to keep it lean. If you want to delete plugins that they installed, click on Plugins on the menu on the left side of the screen. To delete a plugin, you first need to deactivate it. Click on the “Deactivate” link. After you have deactivated it, you can click on the Delete link to remove it.
What’s the next step?
Now that you installed WordPress and cleaned it up a bit, it’s time to learn how to do more. In the next lesson, we’ll learn How to use WordPress.